

Team, billing and audiences
Invite your team, manage your plan and billing, follow store sales per brand, and build audiences from your buyers. Some of these features are limited to enabled organizations, as noted below.
Invite your team
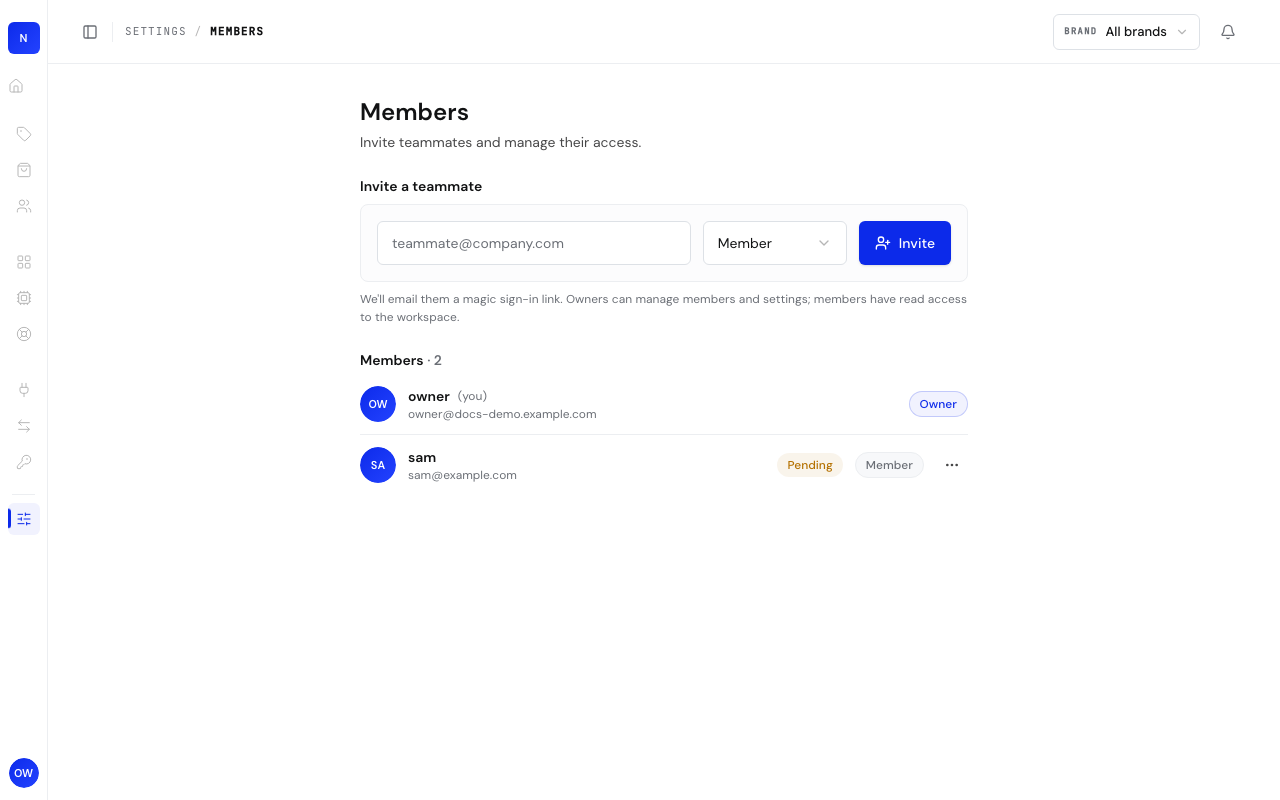
- Open Settings in the sidebar, then Members.
- Under Invite a teammate, type an email, choose Member or Owner, and click Invite. Lucen emails them a magic sign-in link. Until they sign in, their row shows Pending.
- In the list, the ... menu on a row lets an owner Make owner or Remove from organization. You cannot change or remove yourself.
- Owners can invite and manage members and settings. Members have read access to the workspace, and the invite form is not shown to them.
The screenshots in this guide show the portal in English.
Plan and billing
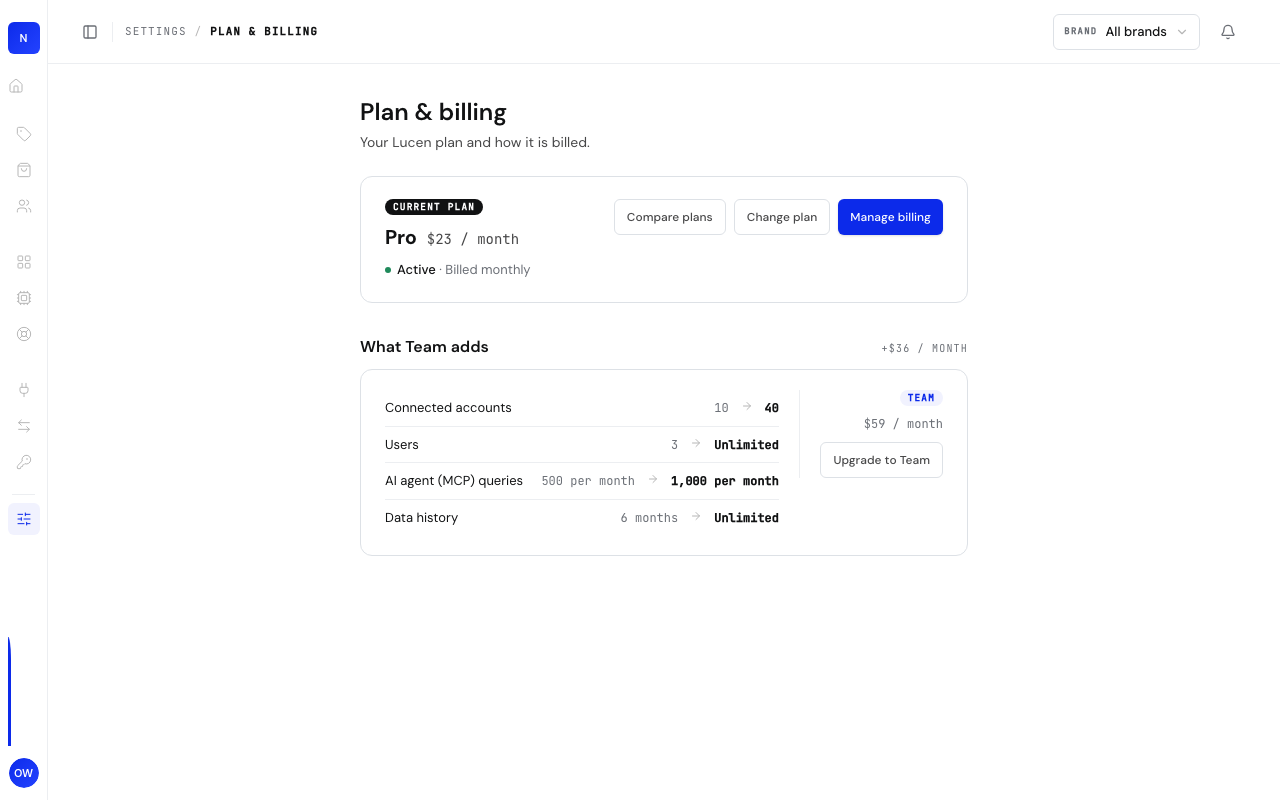
- Open Settings, then Plan & billing. The top card shows your plan, its price, how it is billed and, for a paid plan, when it renews.
- On the Free plan, an owner sees the plan picker. Choose monthly or annual billing and click Upgrade to the plan you want. You pay through Stripe Checkout.
- On a paid plan, Manage billing and Change plan open the Stripe billing portal, where you change plan, update the card, see invoices and cancel. Compare plans opens the public pricing page.
- Below the card, a section named after the next plan, such as What Team adds, lists only the limits that change, and the usage section shows how much of each limit you have used and when it resets.
- Members can see the plan but not change it. A workspace billed through Shopify shows a notice and a Manage plan link to Shopify instead. A workspace billed by Blumie shows a notice and no plan picker, and changes go through the Lucen team.
After you pay, Lucen waits for Stripe to confirm. The page shows a processing notice for a short time and then a success message. If it takes longer than expected, use Check again.
E-commerce
- Connect a store from Connections, then open E-commerce under Operate. The list shows today's sales and paid orders for each brand, compared with the same weekday last week.
- Open a brand to see its detail. The tabs are General, Finance, Orders and Advertising, and a Customers tab when it is enabled for you.
- Use the period picker for presets like Last 7 days or any custom range, and the channel and store filters when a brand sells in more than one place.
- A banner explains the state of the data, for example while an order history import is still running or when a store connection needs attention.
The store data is read from your warehouse, so it only appears once the store is connected and its first load has finished. Costs on the Finance tab depend on the fees, taxes and product costs you set up under E-commerce in the sidebar.
Audiences
An audience is a group of a store's buyers, such as lapsed buyers or high value buyers. Lucen shows how many people are in it, never who they are.
- Open Audiences under Operate and click New audience.
- Choose the store, then a recipe: Lapsed, Recent purchasers or High value. Lucen shows the size of the audience as you adjust it, and you give it a name. Click Create.
- Open the audience to see its rule, its size and when the size was last measured. Delete audience removes it.
- Audiences are grouped by brand and store. With two or more brands, the top bar Brand switcher filters the list.
Troubleshooting
An audience is Blocked.The store has not been confirmed for its brand. Use the banner on the audience to confirm the store.
I do not see Plan options.Billing controls depend on whether billing is enabled for your organization. Without it, the page shows your plan name, plus a notice if you are billed through Shopify.